Simple dress design history
Shift get dressed: This layout is a simple, quick dress that falls immediately down from the shoulders. it’s best for any body type.


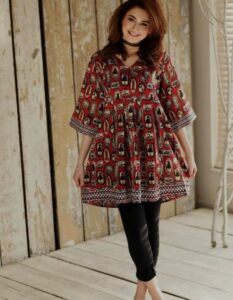
blouse dress: This design is an extended version of a blouse, buttoned down all the manner. It appears chic and comfy for ordinary put on.
Wrap dress: The get dressed has a the front closure that wraps around the frame, tying at the waist. It flatters nearly everybody shape by means of developing an phantasm of a slimmer waist.
Easy dress design step
1. Take suggestion from modern-day tendencies, historic fashion or your private style.
2. sketch Your dress: as soon as you have got an idea, start sketching it out. Draw a primary human figure after which layout your get dressed on it. You don’t want to be an amazing artist, the intention right here is to visualize the dress.
3. pick your fabric: Now that you have your design, think about what kind of fabric will work pleasant with it.


four. degree your self: with the intention to create a get dressed that suits properly, you will want to measure your self as it should be.
five. Create a sample: based totally to your measurements, create a sample on paper. this could include front and back bodice, front and back skirt, and any other pieces together with sleeves.
7. collect the get dressed: begin stitching the portions collectively. it is generally simpler first of all the pinnacle and work your way down.
eight. attempt it on: After sewing all of the pieces together, attempt at the dress to look if there is any element that wishes adjustment.


9. Make modifications: based totally in your becoming, you could need to modify sure elements of the get dressed.
10. very last Touches: after you’re happy with the in shape, upload the completing touches along with zippers, buttons, hems or any elaborations you need.
eleven. Iron the dress: After the dress is complete, iron it to cast off any wrinkles or creases.
12. exhibit your paintings: Congratulations! you’ve got made your very own dress. show it off and wear it proudly.
1. pick out your layout: earlier than you can begin designing, you ought to first determine what type of get dressed you need to make. this will contain selecting a selected style, along with a maxi get dressed, A-line dress, wrap get dressed, and so forth. You ought to additionally recall the occasion for which the dress is being made, as well as the season.
2. comic strip your design: start sketching your layout on a chunk of paper. consist of all of the info including duration, neckline, sleeve fashion, waistline, and some other precise functions.


three. choose your material: as soon as your sketch is achieved, the subsequent step is to pick the best cloth. You should pick out a cloth that suits the fashion of the get dressed, the season, and is relaxed to wear.
4. Make a pattern: Create a sample of your layout the use of paper. you will need to create styles for each part of the dress – the bodice, the sleeves, the skirt, and so on.
five. reduce your material: After creating your pattern, pin it to the fabric and cut the material alongside the sample strains.
6. stitch your get dressed: stitch your pieces of cloth collectively in keeping with your sample and caricature.
7. healthy and finish: as soon as the basic dress is sewn, attempt it on to test the in shape. you might want to make adjustments in areas just like the bust, waist or hips. After the get dressed suits flawlessly, upload the completing touches like hems, buttons, zippers, or other embellishments.
eight. Press the dress: finally, you will need to iron the get dressed to eliminate any wrinkles and to help the seams lie flat.

9. test the overall layout: take a look at whether or not the whole thing is as in line with your layout. in case you locate any discrepancies, it is less difficult to accurate them at this degree.
10. wear your design: The very last step is to put on your layout and sense proud of your accomplishment!
do not forget, developing your own dress is all approximately creativity, endurance, and practice. it is ok if it is no longer perfect on the primary try, preserve experimenting and gaining knowledge of, and you’ll get better with time.
1. begin by using sketching: Use a pencil and a sketchpad to start drawing your layout. It does not need to be ideal – it is only a draft at this factor.
2. upload info: once you’re glad with the fundamental form, begin including in details. this can include things just like the neckline, sleeves, belt, buttons, zippers, and so forth. You have to additionally consider the duration of the get dressed and the way geared up you want it to be.
three. pick fabric: bear in mind the form of fabric you want to use for your dress. special fabrics will drape otherwise and affect the general appearance of your design. think about the color, pattern, texture, and weight of the material.


4. this may be completed with the aid of drawing out every piece of the dress (the front, lower back, sleeves, etc.) on large portions of paper. make sure to feature allowances for seams.
five. reduce out sample: after you’re happy with your pattern, reduce it out.
7. reduce out material: cautiously reduce around your pinned sample, making sure to not distort the fabric or the sample.
eight. sew collectively: After you have cut out all your fabric portions, it’s time to start sewing. follow your pattern’s instructions on how to bring together the portions. generally, you begin with the bodice (pinnacle) of the get dressed and paintings your way down.
nine. completing touches: as soon as you’ve got sewn your dress together, add any finishing touches which include hems, zippers, buttons, or different decorations.


10. attempt for your dress: The final step is to strive in your dress and ensure it fits efficaciously. If there are any areas that are too loose or too tight, you could need to make some changes. when you’re happy with how it suits, your get dressed is prepared to put on!
Thanks for watching!