Goddess braids history
Goddess braids are a style of braiding this is much like conventional cornrows but large and extra pronounced. they are a protective hairstyle, which means they assist guard herbal hair from harm as a result of environmental factors, manipulation, and styling tools.
Goddess braids can be styled in various approaches, which include being braided close to the scalp or as free-hanging braids, and can be accessorized with beads, cuffs, or colored yarn.


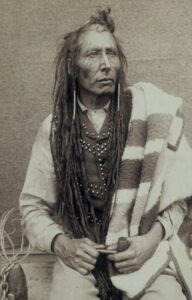
This coiffure is mainly famous inside the African and African-American groups because it honors cultural background even as also imparting a realistic answer for coping with and protective herbal hair.
goddess braids steps
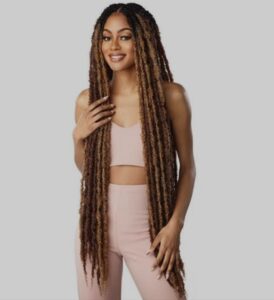
creating goddess braids, a style acknowledged for its massive, raised braids which can mimic a crown or halo, entails numerous steps. This style isn’t always handiest lovely but also shielding, making it a famous preference for those looking to hold the health in their hair whilst sporting a lovely coiffure. underneath is a step-via-step guide to reaching goddess braids:
### What you’ll want
– Rat-tail comb for parting
– Hair clips for sectioning
– Hair gel or aspect control
– Braiding hair extensions (elective for delivered period and quantity)
– Hair ties or rubber bands
– mild oil or sheen for completing

### Step 1: prepare Your Hair
– **Wash and condition:** start with clean, detangled hair. Wash and deep condition your hair to make certain it is hydrated and viable.
– **Moisturize:** practice a depart-in conditioner to keep your hair moisturized below the braids.
– **Blow Dry (elective):** in case you prefer to braid on stretched hair, gently blow-dry your hair while detangling it with a wide-enamel comb or a detangling brush.
### Step 2: element Your Hair
– Use the rat-tail comb to element your hair into sections wherein you want every braid to lie. you can opt for immediately-back cornrows, a halo braid, or any design you like. Make the parts smooth or even for a neat appearance.
### Step three: follow side manipulate or Gel
– easy down each section with edge manipulate or gel to tame flyaways and ensure sleekness. This step helps in dealing with your hair even as braiding and offers the coiffure a polished appearance.


### Step 4: add Braiding Hair (optional)
– in case you’re the usage of extensions, prepare the braiding hair with the aid of cutting it for your favored period and lightly stretching it out to taper the ends. attach the braiding hair to your natural hair the usage of your selected approach (e.g., the feed-in method) as you braid.
### Step 5: start Braiding
– Braid each phase from the foundation to the stop. make certain your braids aren’t too tight to avoid tension on your scalp and edges. For goddess braids, you’ll want to braid loosely to create that signature raised, thick appearance.
– As you braid, you can add more braiding hair to acquire the thickness and period you choice.
### Step 6: comfy the Ends
– relaxed the ends of your braids with hair ties or rubber bands. when you have used extensions, you might pick out to dip the leads to warm water to seal them, however be careful with this step to keep away from burns.


### Step 7: Lay Your Edges and end Up
– Use a piece of gel or part control to put your edges and create any favored designs.
– observe a light oil or sheen spray over your braids for a wholesome shine and to maintain them moisturized.
### Step eight: renovation
– Wrap your hair in a silk or satin headscarf or use a bonnet at night time to preserve the style and reduce frizz.
– preserve your scalp moisturized and your hair hydrated through applying light oils or braid sprays designed for shielding styles.
Goddess braids can final for numerous weeks with right care, making them an excellent choice for a shielding style that mixes elegance with practicality. take into account to pay attention in your hair; if you experience any soreness or anxiety, in particular around the edges, it may be a signal that the braids are too tight.

### substances wanted:
– Comb
– Hair gel or pomade
– Hair clips or bands to section hair
– artificial or natural hair extensions (elective for brought duration or volume)
– side manage (optional for glossy edges)
– Hair ties or rubber bands
– Mousse or placing lotion (non-obligatory for completing)
### Steps:
1. **prepare Your Hair**: ensure your hair is very well washed, conditioned, and detangled. if you opt for, you can stretch your hair the usage of a blow dryer on a low warmth placing for added length and ease of braiding.


2. **segment Your Hair**: Use a comb to part your hair into sections in which you want your braids to lie. For goddess braids, you can opt for anywhere among 4 to 8 large sections relying on the dimensions of braids you desire. Use hair clips or bands to preserve the sections separated.
3. **observe Product**: Take the primary phase and observe a small quantity of hair gel or pomade to smooth out the hair and ensure your braids are neat and remaining longer. If the usage of facet manipulate, practice it along your hairline for a cultured look.
4. **begin Braiding**: if you’re including extensions for length or volume, begin by braiding your natural hair, and contain the extensions as you move. keep the braid close to the scalp, braiding all the way down to the desired period. make sure to braid tightly but quite simply, ensuring the braid is secure however now not causing tension at the scalp.
5. **Repeat for every section**: keep the technique for each segment, making sure each braid is uniform in length and tension. Take a while to make certain every braid is neat and well-formed.


6. **secure the Ends**: Use hair ties or rubber bands to cozy the ends of the braids. when you have used extensions, you could additionally burn the ends (if they are synthetic and it’s safe to do so) or dip them in hot water to seal.
7. **Lay Your Edges**: in case you choice, use an edge control and a small brush or toothbrush to style your child hairs into swoops or waves around your hairline for a completed appearance.
8. **final Touches**: observe mousse or putting lotion over the braids to hold flyaways at bay and give your hair a elegant look. you could additionally wrap your hair with a silk or satin headscarf overnight to help set the braids and reduce frizz.
Aftercare:


Goddess braids can closing for numerous weeks with proper care. Wrap your hair at night time with a silk or satin headband to prevent frizz and moisture loss. Moisturize your scalp and the length of your braids with mild oils or a braid spray to keep them searching sparkling and to save you itching.
Thanks for watching!